- Oct 21, 2016 |
- Driving and Ergonomics
Safely Putting on Winter Tires
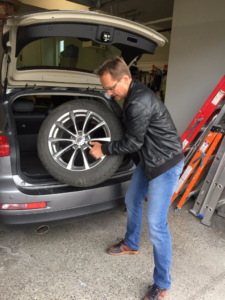 It’s that time of year again when most of us think about putting winter tires on our cars. If you are someone who takes them to the service shop for them to do this, all you have to do is lift them into your car and drive them there. As they are heavy, this can be a difficult task if you don’t do it correctly or get help. But if you are one of the many DIYs who enjoy or need to do this task themselves, it can be an even riskier job for your back.
There are five steps to changing your seasonal tires: Retrieving them from their storage spot,loosening the lug nuts and jacking up your car, removing the current tires, putting the new ones on, and putting the old ones away. Each step has its own set of physical difficulties and potential risks associated with them. Retrieving your tires generally has to be done if you are doing it yourself or getting a shop to do it.
What is Good Body Mechanics?
Before we talk about each step individually, it is important to make sure we are on the same page about what good posture is. Good posture for applying forces is one that keeps the back in its natural curves whereby the lower back has an inward curve, not a hunched forward curve. The forces you apply must be kept close to the body, so your elbows need to be kept close to your sides when applying forces (lifting, pushing, pulling). Bending your back at the waist can put a lot of pressure on the discs and muscles in your lower back. Twisting aggravates this and can increase the strain dramatically. Try to keep your back straight, shoulders relaxed, head facing forward, and elbows beside your body (objects close)!!
Step 1: Retrieving the Tires
You likely have a spot in your garage or shed where you keep your winter tires. They are usually tucked out of the way and may be hard to get at. You may have to move many other heavy items before you can even get to the tires. Having to pull them out of a cramped spot or from a big pile may put your body into awkward and twisted positions. As well, if they are piled up, you either have to drag and drop them off the pile, risking damaging them, or you have to lift / lower them.

Recommendations:
Make sure you keep the tire close when you go to move it, whether you are lifting it, dragging it out of a crawlspace, rolling it or simply dropping it off a pile. The closer it is to you, the more leverage you have, the more muscles you can use to move it, and the less likely you are to bend forward. Think of the tire touching your chest or legs. To avoid a worry about getting your clothes dirty, ensure you wear appropriate clothing for this job. If you are dropping them off a pile, place a few tires on the ground beneath them first so they can drop down more easily.
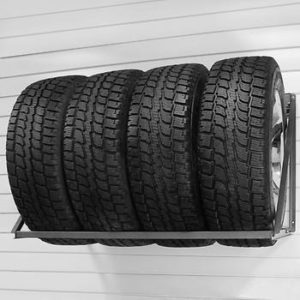
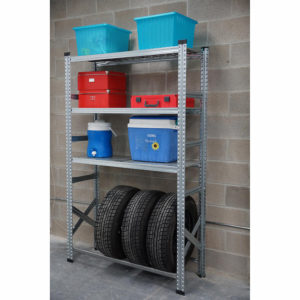
For the future, it is best to think about how you have stored the tires. Having a proper shelving system to keep them neatly stored will avoid you having to move lots of items to get to them and may avoid you having to lift them at all!.
Step 2A: Loosen the Lug Nuts
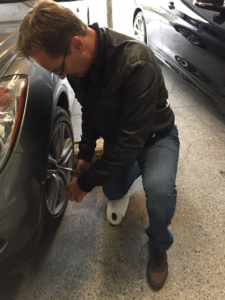
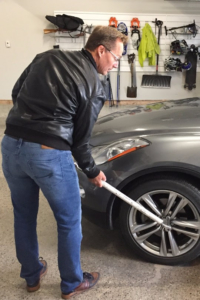
To remove the tire, you will need to loosen the lug nuts. If they are rusty or worn, this will be a more difficult and physically demanding job than otherwise. It is necessary to loosen these nuts BEFORE you jack up your car or your wheel will just spin. If you have a compressor and power ratchet, you can use this to make loosening these nuts easier. But if you aren’t that fortunate, you will need to use a manual ratchet with a tire iron, crowbar or other long pole and maybe even a pipe to give yourself added leverage. Pushing down is better than pulling up as you can put your body weight into this. It is important again to keep the natural curve in your back and not bend at the waist while applying force. Bend at the hips and your knees. If you end up putting your knee on the ground, use a cushioned pad to make your knees comfortable.
Step 2B: Jack up your car
Once the lug nuts are loose, you need to lift your car. This job can be easy if done properly. Ensure that the jack is inserted properly beneath the car and that the handle you use is long enough to create good leverage and avoid you having to bend over too much. As you apply upward and downward forces on the handle, you need to remember to keep the inward curve in your lower back by bending more at the hips than the waist and bending your knees. If you are particularly tall and the handle isn’t too long, you should consider bending your legs more while you do this.
Step 3: Remove the Tire
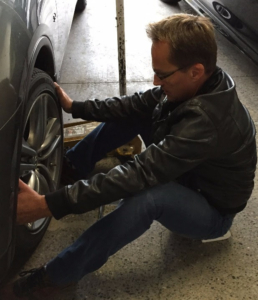
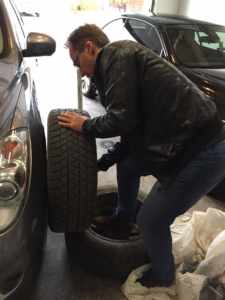
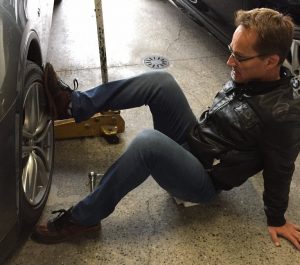
This job can be difficult if not done properly. The tire is often stuck in its wheel well pretty snugly. I’ve watched people kick or push on the tire, alternating sides to try to loosen it. Make sure you do this with purpose – keep your body square and don’t twist your back when kicking. When you are ready to pull the tire off, it’s easiest to sit down and pull it off with both hands. If you then push it to the side and lean it against something, you won’t have to pick it up again when you go to put it away.
Step 4: Put the New Tire on
When putting the new tire on, its best to raise it on something that is about the right height so it can easily be pushed on. Trying to hold the weight of it up to the bolts while trying to push it on can be cumbersome and hard for the body to hold a good position.
Step 5: Put the Old Tires Away
Once you have changed your tires, putting the old ones into a safe, organized, and easy to reach spot will make it easier to retrieve them next year.
Summary of the Important Points:
When bending, lifting, pushing or pulling, the following tips are very important:
- Keep your body in good alignment with a good stable base of support. Have one leg behind the other or put one knee down to achieve this.
- Keep the natural curves in your back.
- Keep your elbows and the weight of the object close to your body.
- Get help if needed.
There are some good stretches you can do before and/or after this activity to keep your muscles comfortable.
Anderson Ergonomics Consulting offers Back Care training courses for all sorts of work environments for all different types of jobs. Contact us for more information on how we can provide safe and effective training for your organization.


